Playing a musical instrument doesn’t have to be expensive! There are lots of ways to create your own instruments using recycled materials that almost everyone has around the house. From percussion instruments to pipes and string instruments, there are no limits to your creativity.
The first and simplest instrument is the kazoo. Many people know its funny little-trumpet-like sound from comedy shows and movies. All you need to make your own is a roll of toilet paper, some paint, an elastic band and wax paper.
First, the painting: Transform the roll of toilet paper into something colourful and beautiful by painting it. This step can be a bit tricky as you want to make sure you keep the roll in its round shape.
Then cut out a piece of wax paper. You can use a bowl to draw a circle on the paper that is large enough to fit around one end of the toilet roll, and then cut it out.
Wrap it around one end of your painted toilet roll and secure it with the elastic band.
Finally, make a small hole in the middle of the toilet roll to let the air out of the instrument. You will need a sharp needle or scissors to do this, so be careful not to hurt yourself.
Now your kazoo is finished and ready to play!
Put the open end to your mouth and sing or speak into it to create the funny sound. If you want to practise more professionally, try playing a pop song with a kazoo in it, such as “Je veux” by the French singer ZAZ.

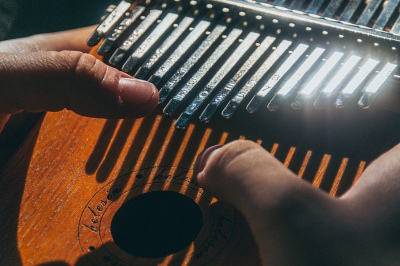
The instrument mbira is often referred to as the thumb piano. It is more complicated to make, but great to play! Mbira were invented thousands of years ago in Zimbabwe and Malawi, and the art of their making has even been added to UNESCO’s list of intangible cultural heritage. A commercial version called the kalimba was produced in the 20th century.
Whatever you call it, it is an interesting instrument that requires nothing more than scrap wood or a shoebox, five hairpins and paint. Plus (and this is why an adult should help you), you’ll need a hammer and a staple gun.
The bobby pins should be straightened and positioned on the piece of wood at even distances, with the end pointing towards one edge of the wood. If you prefer to use a shoe box, cut a circle in the centre of the lid and close the box. Place the bobby pins side by side, with their ends positioned slightly above the hole. Staple them to the box or piece of wood as close to the edge as possible. To give them a better hold, you can use a hammer to flatten the pins and staples ( of course only if you are using wood instead of a shoebox!). Repeat this step, but this time change the distance between the staples. For the bobby pin on the far right, put the staple very close to the first one. For the next pins, place the staple a little further to the other end, so that the staple for the last pin is close to the other end.
The final step before your mbira is ready to make music is to bend the bobby pins slightly upwards. If you like, you can decorate your thumb piano with acrylic paint or just markers.
You are now ready to perform on your mbira by plucking the bobby pins!

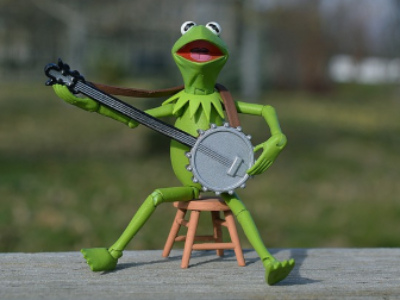
Another instrument played by plucking is the mini lid banjo. As you can tell from the name, it is a tiny stringed instrument. Although it is not particularly impressive in terms of sound, it can make a nice decoration and is still fun to play. To make it, you only need an old jar lid, a wooden popsicle stick, four elastic bands and some sticky tape. If you want to make it more unique, you can decorate it later with washi tape and paint. Use elastic bands of different thicknesses to achieve a more interesting sound.
Start by wrapping the bands around the lid, placing each band next to the other. Then fix them with tape on the side of the lid that they are directly touching. Now use the tape again to attach the popsicle stick to the lid. Finally, you can express your creativity by decorating the stick and the back of the lid with washi tape or paint. Done!

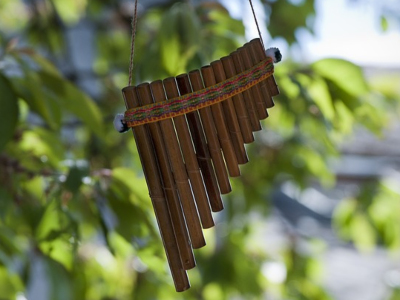
Pan flutes are known in many cultures – and the good news is that they are very easy to build! 8 to 15 straw pipes, sturdy cardboard and some paint, washi tape and feathers for decoration are all you need.
As you will want to be able to play different tunes on your panpipe, the first thing to do is cut the straw pipes. The easiest way to do this is to start with a length of 17 cm. Cut half a centimetre off the second pipe so that it is 16.5 cm long, cut the third pipe at 16 cm, and so on – just continue to cut half a centimetre more off each pipe. This may not be the perfect tuning, but it certainly looks the best!
If you are already familiar with panpipes, you can try to test the sound of the particular straw pipe and adjust it by cutting a little more. More advanced, but with better sound, are tunings of 17.5 cm, 15.5 cm, 13.5 cm, 12.5 cm, 11 cm, 10 cm, 9 cm, 8.5 cm – but this really depends on the thickness and material of the straw pipes you use, so it would be the best option to try it out.
Now there are two ways to continue. You can glue the straw pipes together from the longest to the shortest and then wrap some decorative washi tape around them. The other option is to glue them to a piece of sturdy cardboard, which you can also decorate with paint or washi tape. The second option is better if you really want to play your panflute, as it is more durable.
An additional method to improve the sound of your instrument is to plug the bottom of the pipes with some clay.
And that’s it – now you can play your pan pipes! This may take some practice at first. If you do not hear a sound, try blowing over the top of the pipes rather than directly into them.
Finally, we have one instrument left – the “queen” of this little collection! It is very easy to create, fun to play and has a beautiful sound: the glass harp. Nothing more than wine glasses and water are needed to produce celestial sounds.
Take some wine glasses (be careful not to break them), arrange them in a row on a sturdy table and fill them with water. Try different levels, perhaps half or a quarter of the glass. Now moisten your index finger and carefully stroke the glass rim.
The sound of this unique instrument has fascinated many people, including the Austrian composer Wolfgang Amadeus Mozart 250 years ago. He even composed a piece of music for the glass harmonica – the more professional musical instrument that evolved from the glass harp.
Lolly stick harmonicas, Easter egg maracas, balloon drums – there are an endless number of easy to make instruments for you to discover! We have only scratched the surface. Some great ideas, such as a shoebox rubber band guitar or bottle top castagnets, can be found on the internet. Maybe you want to get even more creative and invent some new instruments using what you find at home. How about self-made rain sticks out of milk bottles? Give it a try!
References:
- https://www.todaysparent.com/family/crafts/how-to-make-a-kazoo-out-of-a-toilet-paper-roll/ – Mandy Milks, Today’s Parent, 9/6/2020
- https://zinginstruments.com/homemade-musical-instruments/ – Ged Richardson, Zing Instruments, 29/6/2022
- https://artsycraftsymom.com/diy-musical-instruments-for-kids-to-make-and-play – Shruti Acharya, Artsy Craftsy Mom, n.d., accessed 22/3/2023
- https://feltmagnet.com/crafts/Music-Instruments-for-Kids-to-Make – Loraine Brummer, Felt Magnet, 6/10/2022
- https://www.bbcgoodfood.com/howto/guide/5-instruments-kids-can-make – Heather Nugent, BBC Good Food, n.d., accessed 22/3/2023
- https://www.greenkidcrafts.com/diy-thumb-piano/ – Green Kid Crafts, 28/9/2020
- https://www.wikihow.com/Make-Pan-Pipes – wikiHow Staff, WikiHow, 12/7/2022
- https://en.wikipedia.org/wiki/Mbira – The Wikipedia Community, accessed 22/3/2023
- https://www.thecrafttrain.com/mini-lid-banjos/ – Kate Grono, The Craft Train, 15/8/2022
- https://kinderart.com/art-lessons/music/zamponas-panpipes/ – Daria Marmaluk-Hajioannou, KinderArt, n.d., accessed 22/3/2023
- https://communautes.cultura.com/t5/Les-tutos-des-experts/Tuto-enfant-fabriquer-une-fl%C3%BBte-de-Pan-avec-des-pailles/ba-p/85917 – julie_cultura, Cultura, 31/3/2017

